
How To Machine Sew or Quilt A Backing Onto your Crochet Piece
The Crochet Crowd video on how to add fleece to your crochet blankets: https://l.facebook.com/l.php?u=http%3A%2F%2Fthecrochetcrowd.com%2Fadd-fleece-crochet-blankets-video-tutorial-pictorial-tutorial%2F%3Ffref%3Dgc%26dti%3D869705466400491&h=ATOb9CJL3jTVcX6F6LK54ykPR_7vZB9E2VJLh-wn3_DxAPrdKPzambI_s6JYgcHVj1LaatmNOMlKZAuKq-fRPi49pRnfG8J_yQNVXAIfre200hjcv8eLzeQd3yn9x9xhNAl6CrUJQ53L
How To Machine Sew A Fabric Back Onto Your Crochet Piece
Tutorial courtesy of Angie Miller
- Step 1/8
-
I was very unsure
of what to do because I didn't want to mess up all the hard work I
did on the photoghan, so I asked my mother in law for help (she can
sew anything you want with her hands behind her back! LOL). In the
first step, we laid the fleece out, put the blanket on top of it,
with the blanket face up, pinned it in place, and trimmed the excess
off. I did leave just a little bit extra on the edges.


- Step 2/8
- When I took it to the sewing machine, I put the photo face down, fleece side up. I put a piece of tissue wrapping paper in under the blanket. It is sewed to the blanket. The blanket and fleece are not turned inside out, because I wanted a flat seam. I didn't want it to be bulky around the edges from having to flip it inside out.

- Step 3/8
- The blanket doesn't flow smoothly through the sewing machine. I had to take my time and give it a little tug to keep it flowing. When I was done sewing it together, this is what it looked like. The paper kept the foot from getting stuck on my blanket and pulling any stitches from the yarn or thread.

- Step 4/8
-
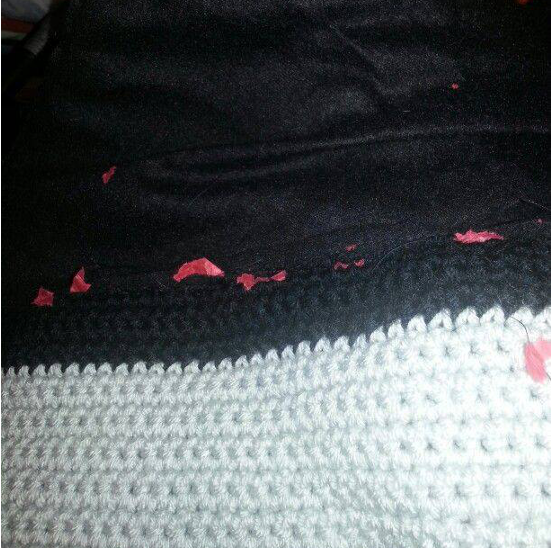
I then had to get
the red paper off. I should've used black since my work was black,
but then the pictures wouldn't have been as good. I pulled on the
paper, gently, and all of it came out. It took a few pulls to get it
all off.


- Step 5/8
- There were little pieces left, so I just picked at them very easily so my stitches weren't being pulled on.
- Step 6/8
- After I got all the red off, it was done! Since I'm not a sewer and not very familiar with thread, I was uncomfortable leaving it that way. I felt that the thread wasn't strong enough to hold it permanently. So, I crocheted a round of single crochet through both the blanket and fleece, right along the stitch line from the sewing machine. I had to use a really small crochet hook so that it was sharp enough to poke through the fleece. It wasn't easy! My hand was red and sore from using my palm to push it through the fleece.

- Step 7/8
- Since I had already sewed it on, I didn't have to worry about keeping it straight or making sure there were no pleats in it when I crocheted.

- Step 8/8
- The fleece stayed straight and smooth all the way around. It was worth the red and sore hand because now I felt like it was very securely attached and was not worried about the stitches coming loose. (My grandma uses an ice pick to poke her holes). You can also tack the piece throughout, using the same color yarn or thread that is on the front side of your work, so that the yarn isn't seen. And that is it!

-
How To Quilt A BackingThis tutorial is courtesy of Catherine Douglas Millsapsworking on the lettering I used floats by carrying my wool along the back of the work


-
Finished W.I.P.


The back of my W.I.P.
Cotton Batting ( one piece cut to
size) you can work up to a 10" square quilting
One Flat Sheet

Flat Sheet, batting and W.I.P. all
securely pinned together
When securing your work, work from
center outwards. I pinned in the ditches (for every 2 rows there is a visible
ditch)
I tacked all 3 pieces together over
1 stitch ... double the yarn, wrapped it around one stitch twice and tied in
the back ..left about an inch tails...
top to bottom every 8" ....left
to right every 7" working from the center outwards
When tacking the pieces together I
used the same colour of wool so it coincides with the front and blends in

1. After tacking All 3 pieces
together I trimmed the Cotton Batting to the same size as my W.I.P all around.
2. The backing I trimmed leaving a 2" border all around.
3. I folded the 2" border in
half, then folded it over the Cotton batting and pinned it to secure it.
4. Then I hemmed the backing to the
Batting all around

I pinned and secured the W.I.P. down
on to the hemming I finished on all four sides

I proceeded to hand sew the 2 pieces
together on all four sides


Front of finished Product

There are 2 forms of batting
...
Poly-fil batting:- which you have to
cut to size and join together the pieces ... and the quilting space is smaller
to work on ..
Cotton Batting:- is cut to size like
buying material ... I found easier to work with ...

the cotton one that I used

No comments:
Post a Comment